NPS 802.1x Radius Authentication with EAP-TLS and strong certificate mapping for non domain joined devices

Table of contents
This tutorial describes the procedure how to use 802.1x EAP-TLS strong authentication especially for non domain joined devices on your LAN. So your device will use a certificate to authenticate itself to get access to your LAN. Since the May 2022 Windows Servers updates, MS pushes the users to use strong certificate mapping when you use certificates as your authentication method. I will show a method how to manually create certificates for non domain joined devices which will be accepted as a strong mapping without using the altSecurityIdentities attribute on the AD object.
You should already have the following parts deployed in your LAN:
- Windows Enterprise Certification Authority (CA)
- A server certificate for the NPS server should be present.
- Switch which supports 802.1x RADIUS Authentication method
- Device (e.g. a Printer) which supports authentication by using the EAP-TLS method.
First we need an AD-Object for the device we want to grant access. First you will think, no problem, just creating a new Computer-Object will be sufficient, but this is only true if you want to use "weak certificate mapping" methods like "UPN" or "Subject/Issuer certificate mapping" which have been disabled by default since May 2022 (see KB5014754—Certificate-based authentication changes on Windows domain controllers). If you really want to use those you need to set the mentioned SCHANNEL registry key to the Hex-Value 0x1F. But in this tutorial we don't want to loosen security, we want to use strong certificate mapping without setting manual mappings in the altSecurityIdentities attributes.
For strong certificate mapping we need to create the computer object using the djoin utility which is primarily used to offline domain join computers. This tool will provision the computer object in a state which will accept strong certificate mappings. So lets do this
djoin /provision /domain "<DOMAINNAME>" /machine "<DEVICENAME>" /savefile unused.txt Replace <DOMAINNAME> and <DEVICENAME> with their respectives values in your environment. The generated text file is not needed and can be removed.
If you want to place the computer object directly in a specific OU you can do this by using the optional parameter /MACHINEOU <OrganisationalUnit>.
This is optional but general best practice and makes managing NPS rules way easier when more devices come into play.
New-ADGroup -Name "<GROUPNAME>" -GroupCategory Security -GroupScope Global
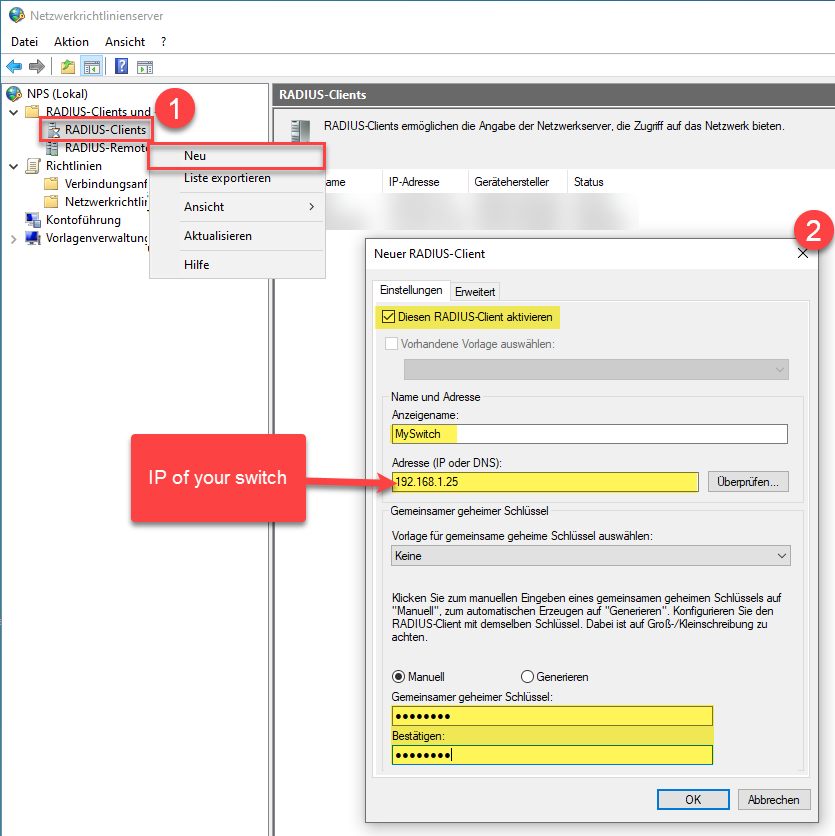
Add-ADGroupMember "<GROUPNAME>" -Members "<DEVICENAME>$" First we need a radius client credential for our switch.
For this example we create a simple Connection-Access rule which allows Ethernet (LAN) media type, but you can adjust this to fit your needs.
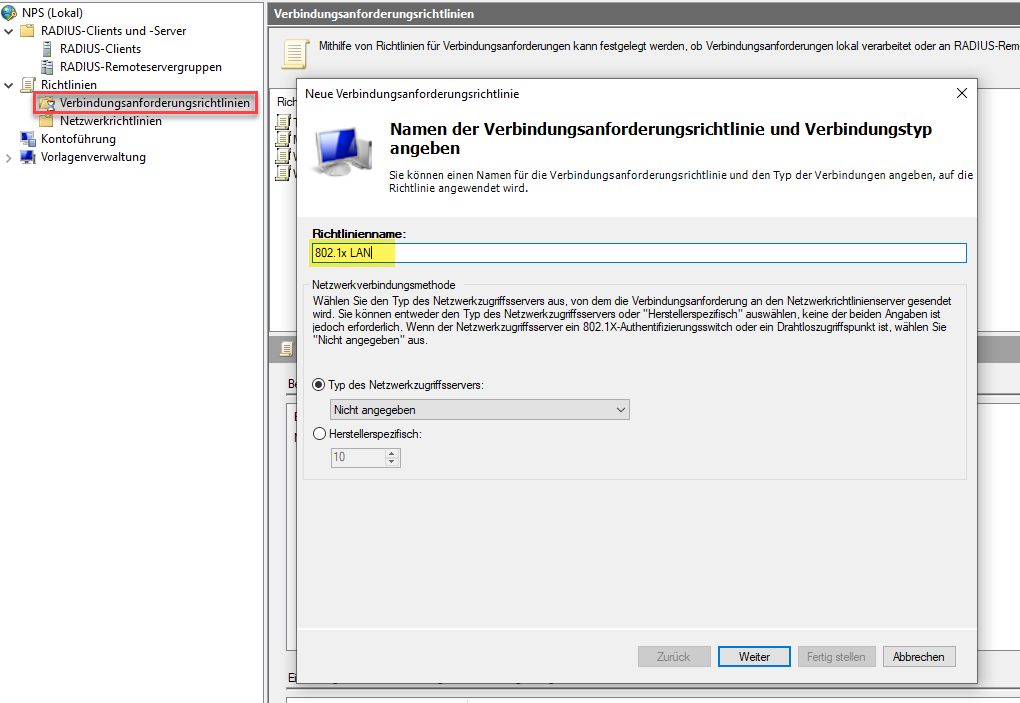
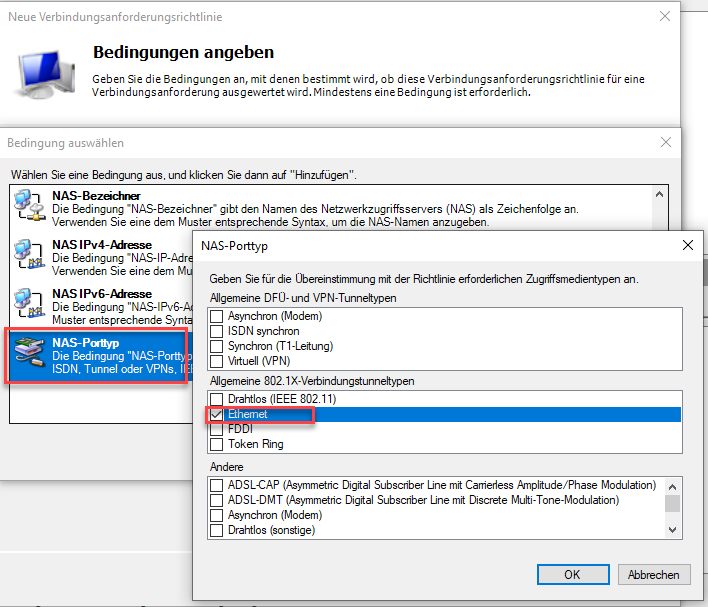
Be sure to place it in the right position in the list of rules, "first match wins!".
Now we create the Network-Access rule
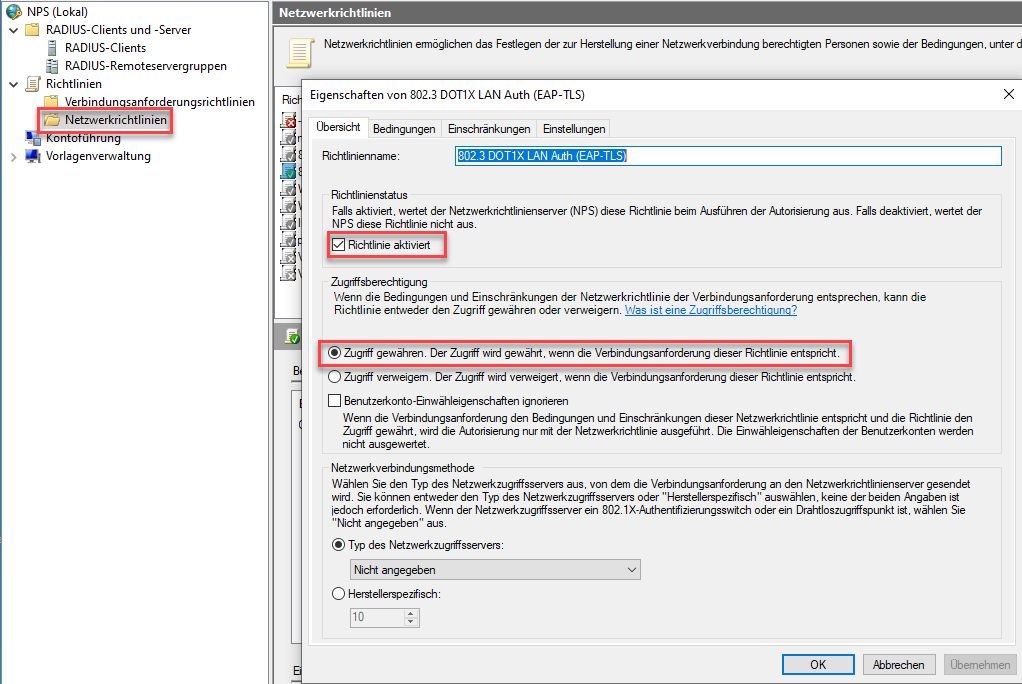
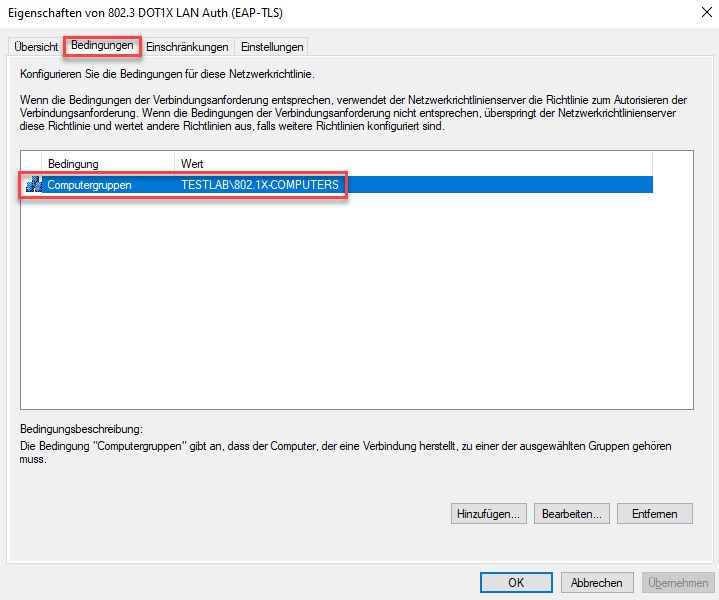
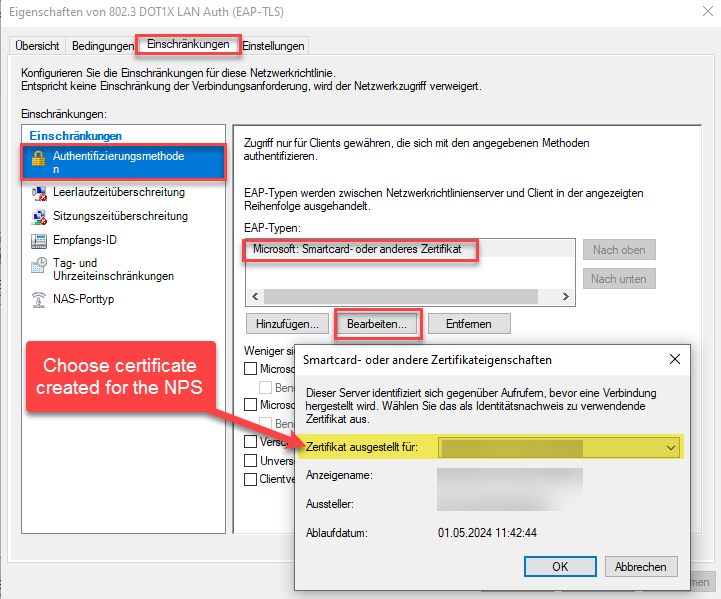
Again, be sure to place it in the right position in the list of rules, "first match wins!".
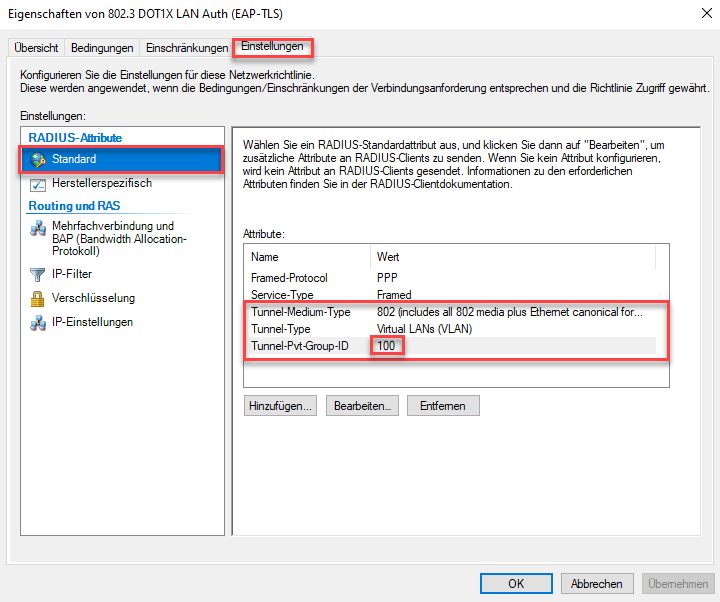
When you want to assign the devices to a specific VLAN add the following three attributes to the access rule, adjust the VLAN-ID to fit your needs.
To be able to create custom certificates for our devices we deploy a new certificate template where we can manually adjust the request parameters.
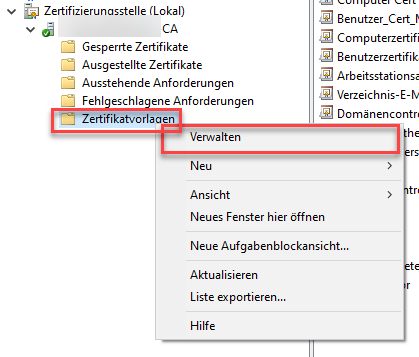
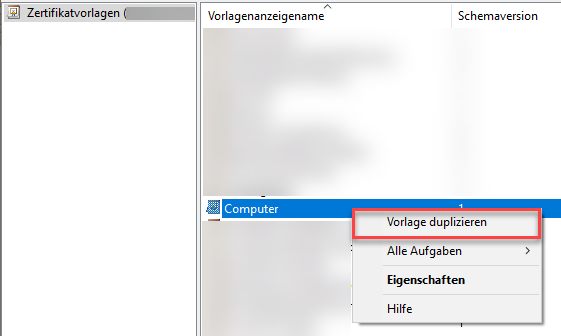
Create a copy of the "Computer" template and give it a name.
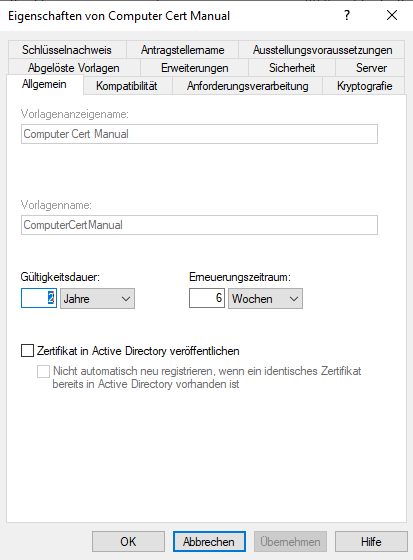
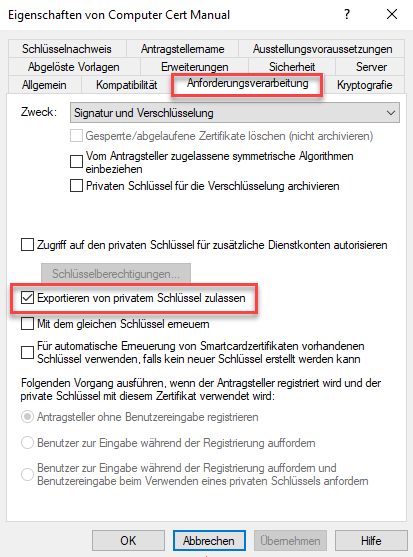
Allow export of the private key
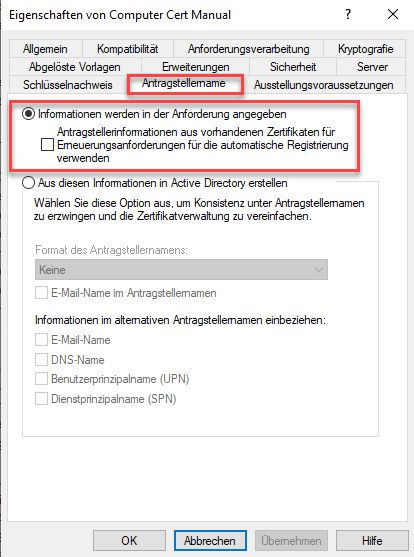
Allow to specify the certificate information manually in the request
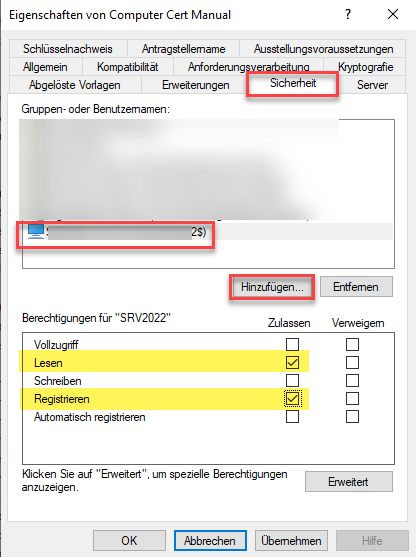
Now add a computer object or computer group which should be allowed to register these certificates. This machine should be well protected when you allow registering certificates without additional release of certificate on the CA.
This step is important to see the template in the MMC when you want to request a certificate with this template.
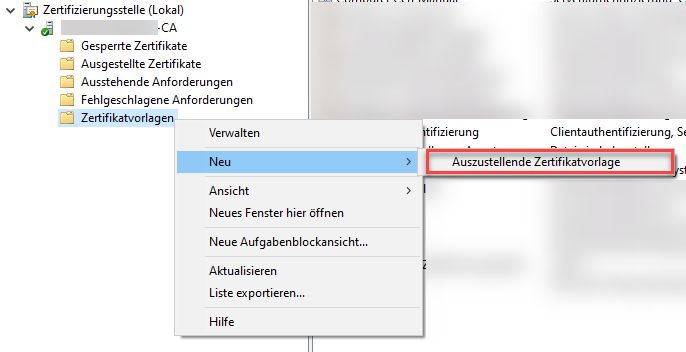
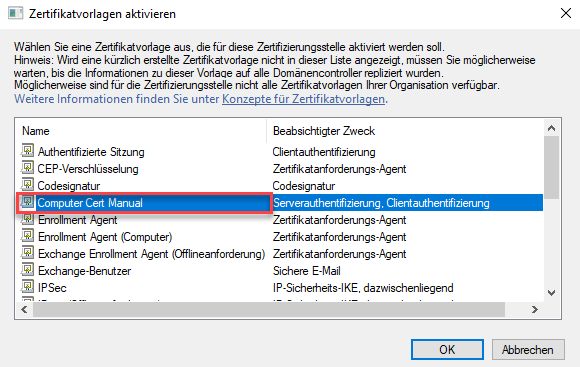
Now save the template, go back to the CA and activate the template:
Logon on one of the computers you added to the certificate template security. There open an empty MMC and add the "Certificates" SnapIn for the local computer. There you open the context menu on the "Personal" section to create a new certificate request:
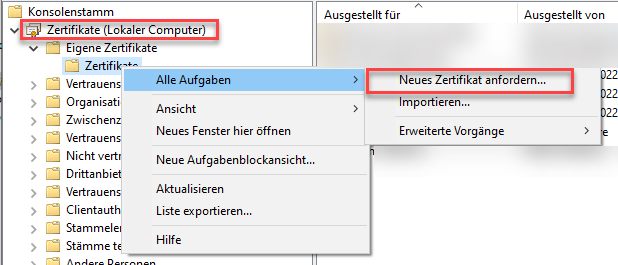
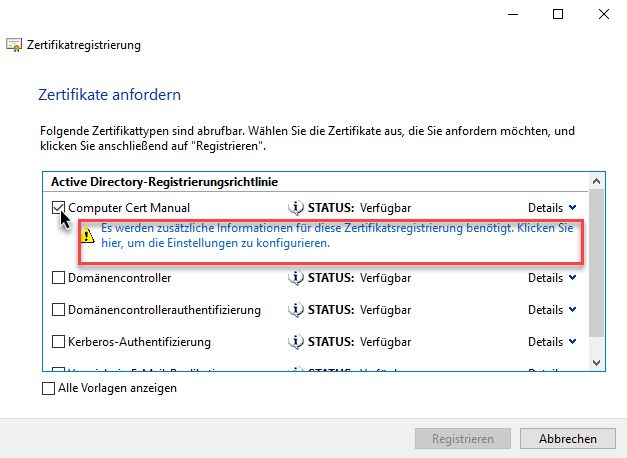
Just click "next" on the screen for the AD policy. When you see the list of available templates, you should see the custom template we created beforehand. Check the box next to the template and click the blue link.
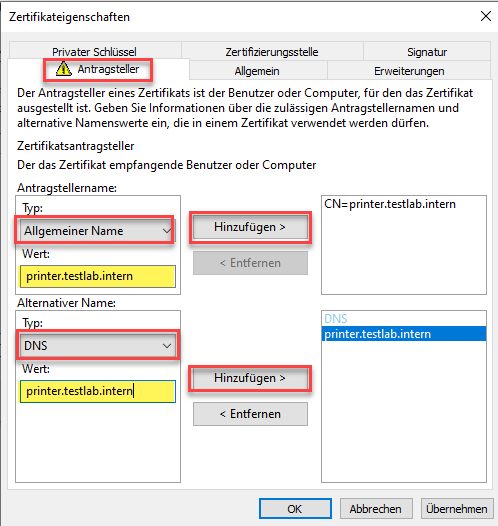
Next enter the FQDN of the device in the upper box for "Common-Name, and in the lower box as SAN (Subject Alternative Name) by choosing the DNS type
Now comes the interesting part. We manually add the additional certificate extension which strongly maps the certificate to the devices AD account.
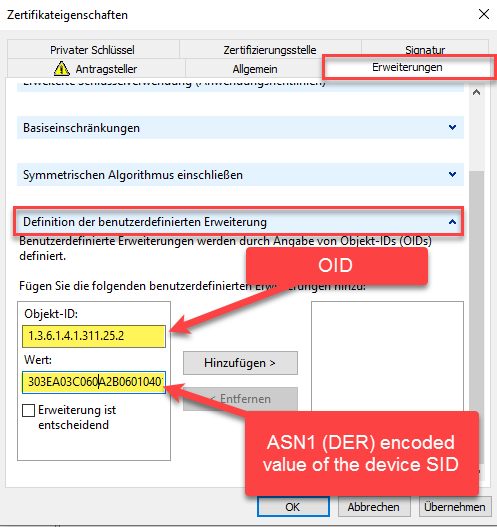
In the "Object-id" field we enter
1.3.6.1.4.1.311.25.2.The value needs to be filled with SID of the computer object we created at the very beginning. The format needs to be a binary string in ASN1 (DER) encoding. To simplify the process of calculating this value i wrote small powershell function which returns the needed value for a any specified sAMAccountName:
function Get-CertificateObjectSID {
    param(
        [Parameter(mandatory=$true)]$samAccountName
    )
    $sid = Get-ADObject -Filter "SamAccountName -eq '$samAccountName'" -Properties objectSID | select -Expand objectSid
    if(!$sid){
        throw "Invalid sAMAccountName!"
        return
    }
    [byte[]]$bsid = [byte[]]$sid.Value.toCharArray()
    [byte[]]$seq = ,0x30 + ($bsid.length + 18) + 0xA0 + ($bsid.length + 16) + 6,10,43,6,1,4,1,130,55,25,2,1 + 0xA0 + ($bsid.Length +2) + 0x04 + $bsid.length + $bsid
    $seqstr = [bitconverter]::ToString($seq).replace("-","")
    return [pscustomobject]@{OID='1.3.6.1.4.1.311.25.2';Value = $seqstr; 'XCA-Extension-String' = "1.3.6.1.4.1.311.25.2=DER:$([regex]::matches($seqstr,'..').Value -join ':')"}
}
To get the value for a computer object use it like this (replace device name with yours, and don't forget the dollar sign ($) at the end for computer objects):
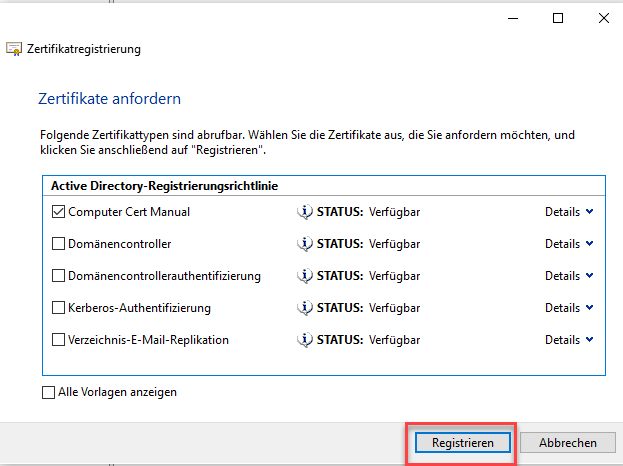
(Get-CertificateObjectSID -samAccountName 'printerA$').Value Copy this value to the above field and click on "Add" to add the extension. Finally close the dialog with "OK" and click on "Register" to finish requesting the certificate.
Finally we can open the certificate to see if our custom extension for the strong mapping has been added:
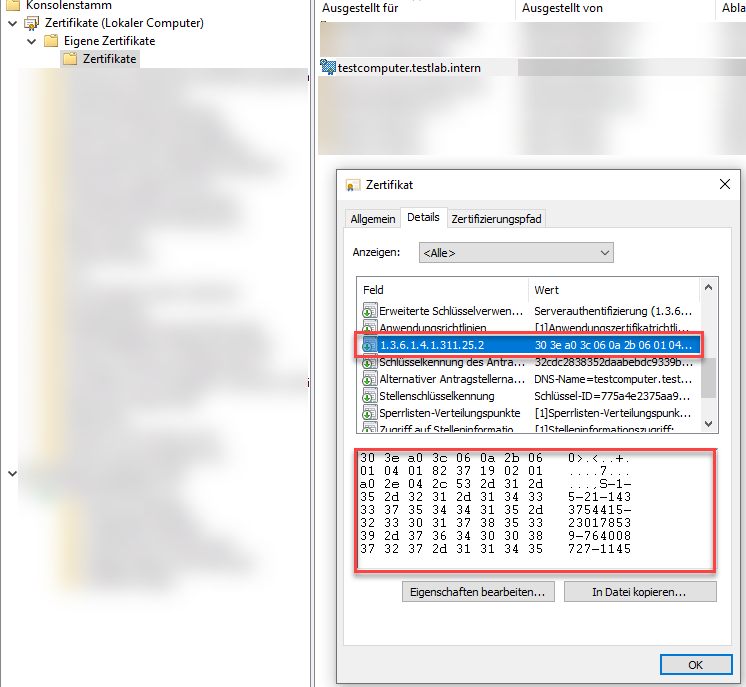
Next you export the certificate as a *.pfx container to import it on your device. Right click on the certificate and choose "Export", the rest as usual:

The generated certificate needs to be copied to your device. The following steps on the device depend on the manufacturer. But the common options are mostly the following
- Authentication Method: 802.1x
- Type EAP-TLS
- Certificate (PFX/P12): Your certificate
- Passwort: The password you assigned on the export stage for the certificate container
- CA-Certificate: To trust your CA, export a copy of the public key of your CA-Certificate and import it on your device
If your device needs separate private and public keys entered in plain text you can use OpenSSL or XCA to extract these from the PKCS12 container.
Using OpenSSL this is done as follows. After entering your password this will output the private and public keys in plain text
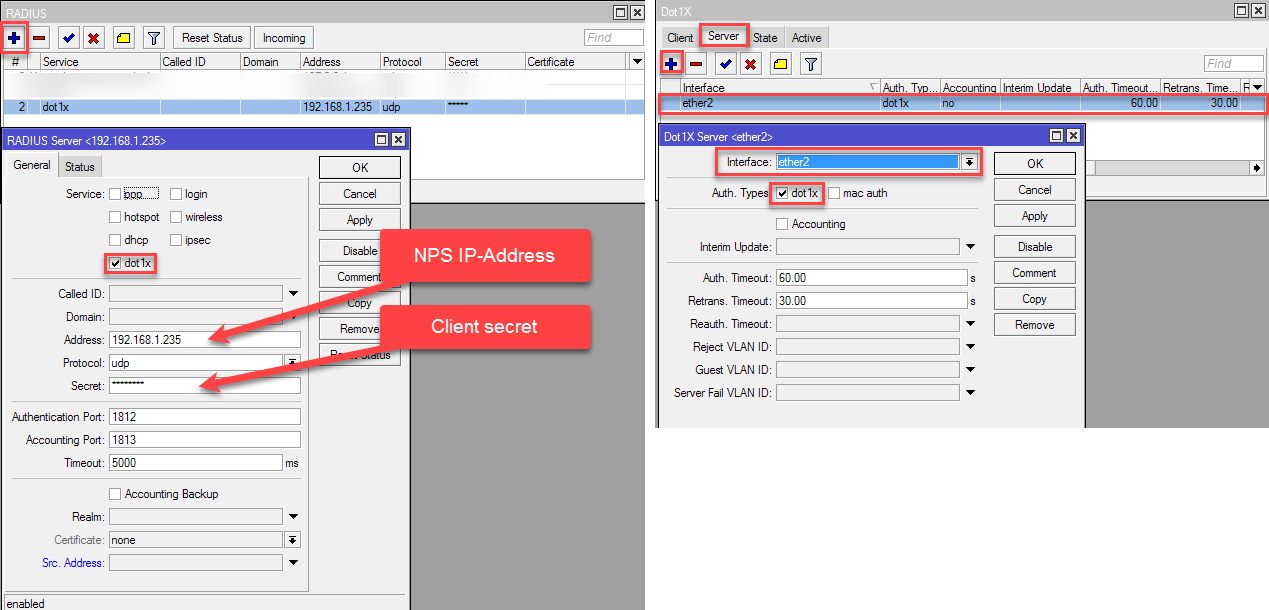
openssl pkcs12 -in mydevice.pfx -clcerts -nodesHere i will only give you an example how this is done on a Mikrotik-Router/Switch, to see how this is done on other devices, see this tutorials of our member @aqui: For example:
Netzwerk Zugangskontrolle mit 802.1x und FreeRadius am LAN Switch
Freeradius Management mit WebGUI
Dot1x Authentication on Mikrotik Router/Switch
Using NetworkManager you can simply use the GUI to create the authentication
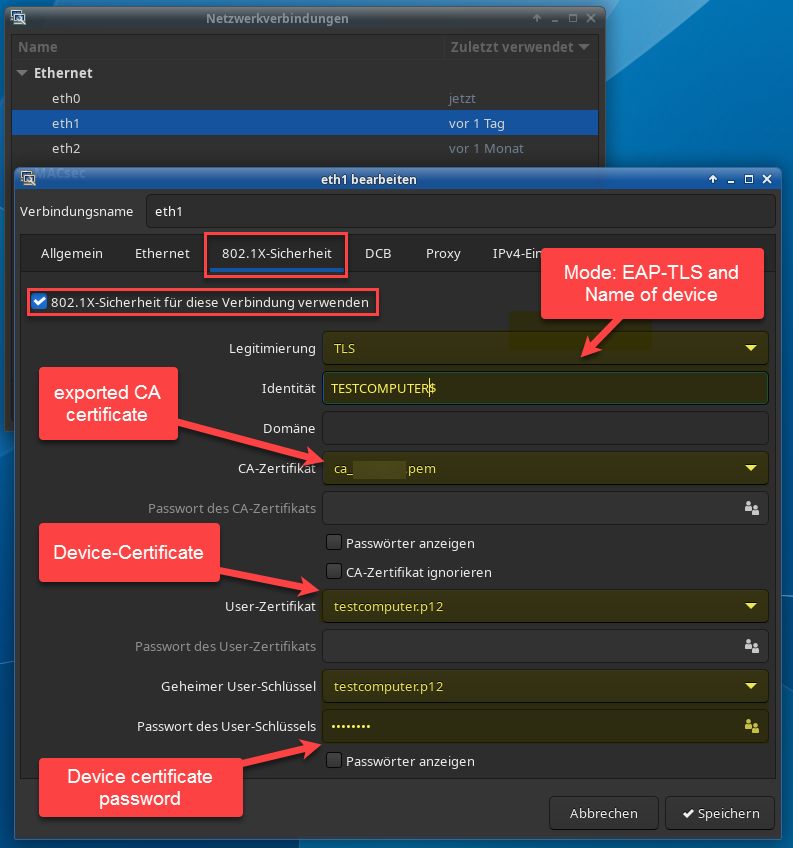
Other devices will have basically the same options.
Please also mark the comments that contributed to the solution of the article
Content-ID: 9670013529
Url: https://administrator.de/tutorial/nps-802-1x-radius-authentication-with-eap-tls-and-strong-certificate-mapping-for-non-domain-joined-devices-9670013529.html
Printed on: July 15, 2025 at 00:07 o'clock
1 Comment
Series: Mikrotik Docker Container
NPS 802.1x Radius Authentication with EAP-TLS and strong certificate mapping for non domain joined devices1Mikrotik: mDNS Repeater as Docker-Container on the Router (ARM,ARM64,X86)1Mikrotik: mDNS Repeater als Docker-Container auf dem Router (ARM,ARM64,X86) (german)16